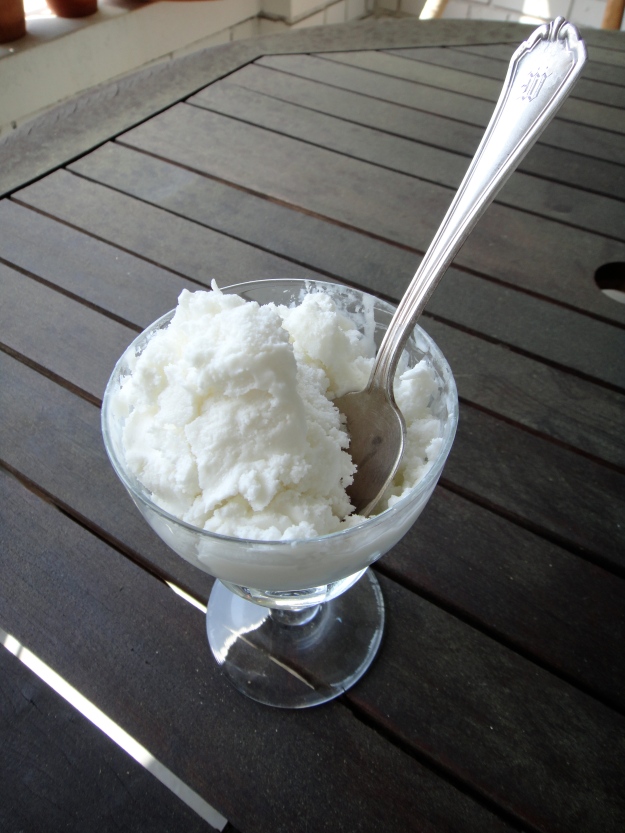
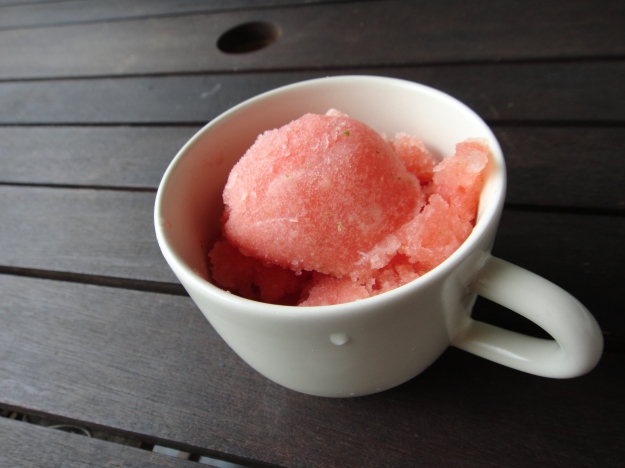
Vodka Watermelon Sorbet

vodka watermelon sorbet

Two boozy frozen treats in a row, I think it’s a summer trend.

A lot of the cooking I do is really improvisational, odds and ends from other projects, friends coming over or someplace to go — what could I make? I don’t go out and shop with a recipe in mind, usually. It’s more often a quest to get through all the produce I so voraciously buy each week.

So, like the Pimm’s Cup Popsicles, this one just announced itself: half a watermelon in the fridge, bunch of limes hanging out, healthy supply of vodka in the freezer, friend’s birthday tonight. Enter boozy birthday watermelon sorbet.

This recipe is definitely purposefully extra boozy, unlike other ice cream recipes where I add a tablespoon or two to help combat the iciness homemade ice cream acquires in the freezer if you don’t eat it right away.

And friends, it’s just so pretty. Like that woman at a party wearing a great dress who you can also tell is a LOT of fun.

Vodka Watermelon Sorbet
makes about 2 pints of sorbet

4 cups of watermelon puree (from about half of a medium sized watermelon)
1/2 cup simple syrup (recipe below)
1 lime, zest and juice
1/2 cup vodka
pinch of salt

Puree chunks of watermelon in a blender until you have about 4 cups worth of liquid. Protip – mash the watermelon chunks with a potato masher a few times before adding to the blender so they will blend up without having to add any extra liquid.

Add the simple syrup, lime zest and juice, vodka and salt. Puree again until well-blended. Chill mixture for at least an hour, preferably longer.

Add to your ice cream maker and process.

Take to a birthday party, or just be a party yourself.

Simple Syrup
makes about 1.5 cups syrup

Simple syrup is (simply) a 1:1 ratio of sugar dissolved in water, but it needs to be heated and then cooled before you can use it in the sorbet recipe.

1 cup of water
1 cup of white granulated sugar

Stir together the water and sugar in a small saucepan. Put over medium heat until the sugar fully dissolves, which will take a few minutes. Watch it to make sure it doesn’t boil over or start to brown.

Remove from the pan and cool.
Pimm’s Cup Popsicles

If you follow me on Twitter, you know I am super into popsicles and ice cream. But really, popsicles are where it’s at this summer. Especially boozy popsicles.

Between a small portion of Pimm’s No. 1 leftover from a friend’s move and a bumper crop of cucumbers from my Mom’s garden, these practically made themselves.

But boozy popsicles are teetotallers — add too much booze and they won’t freeze (although honestly if you end up with boozy slushy who is going to complain). The boozy popsicle primer recommends about 1 shot of booze per cup of liquid (1 shot = 3 tablespoons). But if there’s any boundary I’m going to push, it’s going to be the how-much-booze-can-I-possibly-put-in-these-and-have-them-still-work one. So I added a bit more than recommended here, and they froze up just fine.

They are not sweet, more like a cucumber popsicle with an edge.

Pimm’s Cup Popsicles
makes about 1.5 cups of liquid, which for me was 4 popsicles

1/2 a cucumber, peeled and seeds scraped out
1 cup of water
1 lemon, juice
6 tablespoons of Pimm’s No. 1
small handful of mint leaves (optional)

Roughly chop the cucumber.

Combine the cucumber, water, lemon juice and Pimm’s in a blender and blend for a few minutes, until very smooth (include mint leaves if using). Pour the mixture into your popsicles molds and freeze overnight.

Share with friends.

Strawberry Freezer Jam

strawberry jam jar

If you read here often, you know that my favorite recipes aren’t really recipes at all. They are methods that are easy to adapt to what’s seasonal or craved, or both. They don’t have a lot of specific ingredients or steps, because I find those tedious to write up, and it’s not how I cook. There are many wonderful chefs and home cooks who do this assiduously and beautifully. Just not my thing.

BUT, this jam is awesome and you should make it. Up to you whether you share it with anyone else. I made it with some gorgeous litte Earliglow strawberries from New Morning Farm in Pennsylvania, who come to the Dupont Circle Farmers Market every Sunday. It’s called freezer jam because instead of going through the whole canning process, you can just freeze it. In this case, I only made one jar, so I’m just keeping it in the fridge.

You could easily use this same method with any of the berries that will come our way this summer — blueberries, blackberries, raspberries. The last gasp of the strawberries if you’re lucky enough to still have them around you. I think even peaches.

What have I been doing with my jar… dipping coconut popsicles into a little dish of it, spooning it over chocolate sorbet, smearing it on toast with salted butter, eating it with a spoon.

But I felt it’s highest calling would actually be it’s most humble — a peanut butter and jelly (jam) sandwich. Remember how much I love bread.

peanut butter and strawberry jam sandwich

I only wish I had made more.

Strawberry Freezer Jam
Continue reading

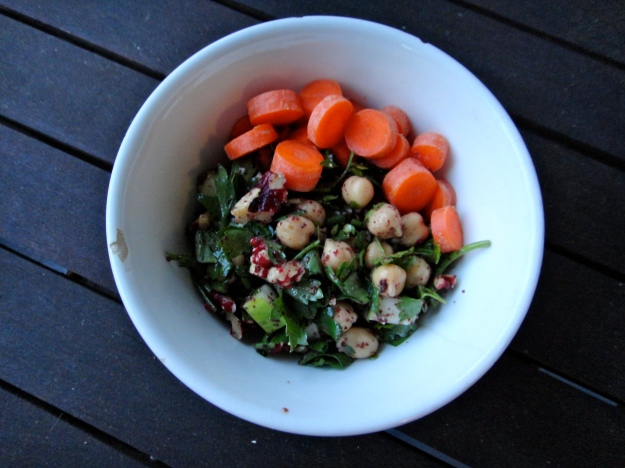
Chickpea salad with parsley, sumac, red walnuts

Ok, not really knowing how to especially feature these delicious red walnuts I acquired, I went simple on this one.

chickpea salad

Chickpea, parsley, sumac red walnuts salad

Sumac is a spice used in middle eastern cooking. It is a purplish-red powder ground up from the fruit of the sumac plant, and has an earthy lemony taste. The color of my red walnuts reminded me of the color of sumac, so off we went.

You could round this out with some pita bread or quinoa, or serve along side some meat or fish, but it was lovely out of a bowl on its own with some sliced carrots tonight.

Chickpea salad with parsley, sumac and red walnuts
Continue reading

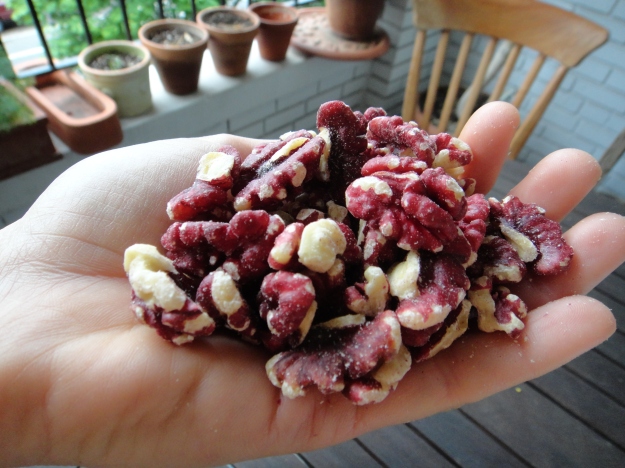
Red Walnuts?

New find from Eataly this past weekend in New York — red walnuts.

red walnuts

I’m not even sure what to do with these. They have the nice walnut flavor but without any of the bitterness. And that color, which looks fake, is actually real.

Ideas? Comment this post, or tweet @MyNextMeal.

No Knead Bread Journal + A Confession

I have a confession to make. And in light of the actual topic of this post, it’s going to be a bit weird. Bear with me.

You know how you have that blog/tumblr rabbithole you go down when you are mindlessly web surfing? For some it’s mommy blogs even though you don’t have kids, others maybe interior design even though you rent your apartment and have no intention of making it look any better, or maybe you just get stuck in an endless buzzfeed.com loop of cat gifs (we’ve all been there).

So for me, one of my web vortexes is paleo cooking blogs.

Now, this isn’t completely baseless. I am very active, and have gone through periods of intense training for various endurance events. Paleo and training go hand-in-hand in many fitness cults circles (looking at you here). And many of the paleo bloggers are legit cooks and good writers.

I actually find the paleo lifestyle fascinating, and some days I’m like hey, I haven’t eaten any grains today, go me! (not that no grains = victory, but of note, perhaps to balance out other cookie-heavy days). In general, I feel like people should eat how they want to eat. Or as Michael Ruhlman put it so succinctly and brilliantly earlier this year: Cook your own food. Eat what you want. (Think for yourself). Words to live by, if I ever heard any.

But here’s the thing — I think that bread is one of the greatest things that we as human society have ever created.

I could eat toast at every meal. Before I eat a piece of freshly baked bread, I hold it up to my nose and inhale deeply, to smell that satisfying yeasty bread smell. My last meal would be grilled cheese, slices of salted buttered bread, and cinnamon-sugar toast for dessert. Bread is the generic placeholder in idioms about our most basic needs as well as our greatest achievements.

So with that introduction, this post is the first in a series about one of my favorite things: bread. More specifically, the no knead bread method. I’m calling it my no knead bread journal.

The no knead bread recipe I use comes from Jim Lahey of the Sullivan Street Bakery, after it was famously published by Mark Bittman in the New York Times in 2006. Its premise is a minimalist technique that lets time do the work, instead of lots of yeast and kneading. Which essentially means: you dump the ingredients in a bowl, let them hang out for a day or so, take the dough out and shape it, let it hang out for a few more hours, preheat a pot in the oven, dump the dough into the hot pot, and bake it. And that’s it. It is both better and easier than most other bread recipes. Then you win.

I started with the classic recipe, linked to above. But then as many cooks do, I began to tinker. And now I actually keep a log of the variations I try, and how they end up. It’s just a google doc with the classic recipe at the top, and then my experiments in a running log below.

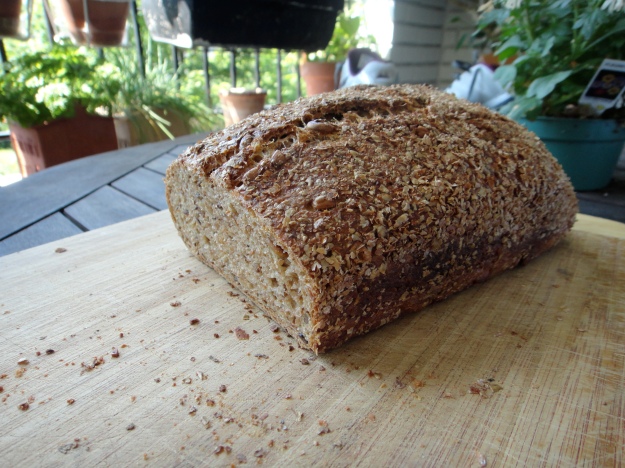
My first round of experimenting aimed for something a bit more hearty, with whole wheat flour, maybe some millet or seeds. More of a weekday bread. But using 100% whole wheat flour turns out to produce a very very dense loaf. I went down the no knead google rabbithole for a while, and learned that adding vital wheat gluten helps add some of the airiness back into whole wheat breads, so I gave that a try, and the recipe is below. The resulting loaf was crisp and crackly on the outside, tender and moist on the inside.

Here’s to bread.

DSC00238

(Mostly) Whole Wheat Sunflower Flax Bran Bread
Continue reading

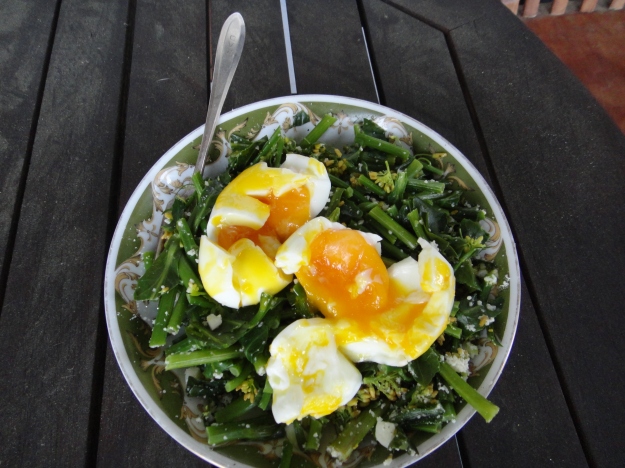
Soft Boiled Eggs and Greens

I have figured out the perfect spring dinner. I think I’ve made it four nights this week. It takes advantage of the best of the spring produce, and is both quick and satisfying.

Soft Boiled Eggs and Greens

For this recipe, I will plug the beautiful eggs I get from The Farm at Sunnyside at the Dupont Circle Farmers Market on Sundays. I also work there a few times a month. Although interestingly, a few weeks ago one of our loyal egg customers gently complained to us that the eggs weren’t poaching very well. We explained that in the winter (this was February, I think), the hens aren’t laying as often, so the eggs we have are a bit older than when turnover is higher. In general, as eggs get older their whites get thinner and spread out more in the water, not ideal for poaching into a perfect little package.

Admittedly, at the time I thought she was being a bit cranky. But next time I went to poach some eggs from the farm, I noticed that she was right. That’s when I started soft boiling, and I’m not sure if I’ll ever go back to poaching. With soft boiling, you get an even more custardy yoke, you don’t have to watch them, just set the timer to 6 minutes and walk away, and they turn out the same every time. You could also easily do six or eight eggs at once, which is much tougher with poaching.

In this preparation (really more of a method than a recipe), you can use any kind of greens. I’ve been using some beautiful kale raab or collard raab, also from Sunnyside. Never heard of kale or collard raab? Some googling around found a nice explanation from growingcurious.typepad.com:

“Raab comes in the spring, from over-wintered brassica varieties. The raab is the flower buds that look like tiny broccoli heads — hence the classic “broccoli raab” that grows from mustard greens (also in the brassica family) and not from a genuine broccoli plant. You can have kale raab, turnip raab, arugula raab, mustard raab, collard raab, and many traditional Asian greens that feature the flower bud. They’re all good.”

A nice trick for peeling soft boiled eggs is to rap the fat end of the egg on the counter, where the air pocket is, and peel up from there. They should peel easily this way.

Soft Boiled Eggs and Greens
Continue reading

Thursday Night Ice Cream – Coconut Frozen Yogurt

I have made ice cream all sorts of ways, but the methods I always come back to are the simplest ones. No cooking, not too sweet, simple and quick. Greek yogurt is a backbone of this approach, since its thick creaminess gets you most of the way there without all the heavy cream or eggs. In fact, once I discovered that you could essentially make Pinkberry-style frozen yogurt by dumping a carton of greek yogurt into the ice cream maker with some sugar, it seemed even sillier to ride that trend (which has since gone from yogurt to cupcakes to donuts… I think we are rebelling against something).

Coconut Frozen Yogurt

This yogurt is so simple you can throw it together after dinner and be enjoying ethereal bowls of it within a half hour (and yes, you’ll eat multiple bowls of it). You may need to adjust the quantities to fit your ice cream maker — this batch nearly overflowed mine, but I wasn’t complaining. And the ratios are fairly forgiving.

I thought about tumbling all sorts of things into the ice cream maker while it was mixing — cinnamon, blackberries, toasted almonds. But in the end, I kept it simple. It’s slightly tangy from the yogurt and just sweet enough to be dessert.

Coconut Frozen Yogurt
Continue reading

Greek Yogurt Panna Cotta

Summer is the time for light meals, but my sweet tooth is not seasonal. This recipe for panna cotta has been revised, and instead of using heavy cream, uses thick low fat greek yogurt, skim milk and low fat buttermilk to produce a lightly sweet and creamy cool dessert. Serve with berries or sliced peaches that you pile into your glass or dish as you eat down the panna cotta.

The flavor possibilities are endless with this one. I added cardamom for some cool spice. You could also go with orange or lemon zest, fresh vanilla bean, or cinnamon. But keep it simple and let the cool clean flavors shine.

Greek Yogurt Panna Cotta
Continue reading

Classic Basil Pesto

In this season of copious basil and fresh summer dinners, the question comes up often: do you have a good pesto recipe? I always balk at this question. Pesto and recipe don’t go together in my mind. You know, a few fistfuls of basil, some lemon zest and juice, some nuts, a few cloves of garlic, cheese if you want it, olive oil until it starts to come together in that softer green emulsified state. It’s just so forgiving and flexible, and can be successful with myriad combinations and ratios of ingredients. But nevertheless, it’s probably useful to have some rough quantities when shopping and preparing, at least until you get the hang of it, so here’s my go at it.

The lemon element is worth discussing since it might not be traditional… I like to add it for two reasons: 1) it helps the pesto to not oxidize and turn brown quite so much, and 2) it brightens up the flavor of the pesto without making it taste lemony, per se. Now, if you’re after that deep sweet earthy richness (who among us is not after that), the quantities here will give you just a shade of brightness without overpowering the richness. If you want more lemon bang, feel free to up the quantities. As I said, this is all very forgiving.

As for salt, go easy, since the parmesan will add some salt, but you just have to do it to taste. Salt, blend, taste, salt, blend, taste, gradually. You’ll know you’ve got it when it stops tasting like garliclemonbasilpinenutsparmesan in a food processor, and starts tasting like pesto.

Basil Pesto
Continue reading